The Tools for Model Railroading
In this Guide for Beginners you will be exposed to numerous construction techniques that require the use of tools. If you are already handy around the house or under the hood of your car, you will be familiar with most of the tools we use. If the world of model construction or "Making" is new to you, this primer on what tools you will need and how to use them should be of interest and value. This part of the guide will introduce you to the basic toolbox and present some hints on how to get the tools you actually need without depleting the bank account.
Two basic axioms that apply to tools. First, USE THE RIGHT TOOL FOR THE JOB AT HAND. While not all tools are purpose specific or limited in application, a certain number are and misuse will result in either damage to the tool or to the project being worked. The replacement cost of a damaged tool is a cost that should be avoided. Second, A POOR CRAFTSMAN BLAMES HIS TOOLS FOR ERRORS. Take the time to learn how to properly use the tool for the purpose intended. Keep the tool in good shape. That includes periodic cleaning and sharpening, if appropriate.
Special Note for NMRA Members: When seeking a source for a new tool, do not forget to take advantage of the NMRA Partnership Program discounts that will save you money on the tools you buy. The discounts will extend your hobby budget and (alternately), by savings, cover the cost of membership. It is a benefit of your membership - please use it.
How long is it?
In model railroading, as in all other construction or "Maker" activities, measurements play a key role in creating a proper finished product. There are two primary tools for measurement: a standard ruler or tape measure, and a model scale ruler. In addition, marking lines that are 90 degrees from each other is an essential requirement for many construction projects and a square or set of squares is recommended.
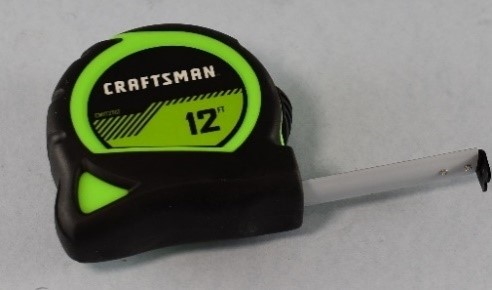
- Measuring Tape. An inexpensive 12-foot retractable tape measure is a general-purpose tool that is necessary for the construction of a module, doing bench work layout, or completing general construction measurements. A tape measure with increments of 1/32 of an inch is generally the best buy. Source - hardware store.
- Scale ruler. A "ruler" that is scribed for the scale you are modeling will be necessary for most structure and car construction projects. Having a ruler marked to scale saves a lot of time and avoids the math necessary to complete conversions. A metal hobby scale ruler is preferred because you will make a lot of use of it. Source - hobby store or hobby outlet online.
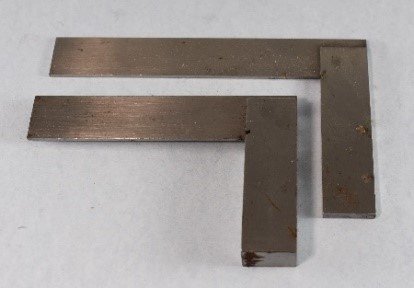
- Square. Another aspect of completing layout measurements is marking cut lines that are at 90 degrees (or square) to your baseline. The simple square will allow you to make these marks, but a more advanced design of square will not only allow a more precise marking but will also help in making the desired cut.
While there are any number of square designs on the market place, the machinist square seems to work best for most modeling projects. The specific design of a "thin beam" square has become my favorite because of the utility of use. Source - hobby store or hobby outlet online.
Helpful hint: If you are going to build several modules or do some serious layout framing, you may find a 4-foot long steel or aluminum ruler is a good buy. The longer ruler helps to layout straight lines, makes measuring longer distances easier, and serves as a good straight edge for laying track. Source - hardware store.
How do I mark it?
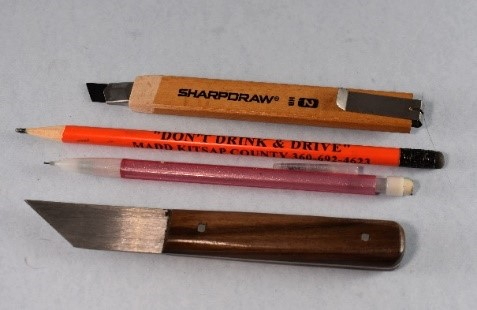
Making a mark to indicate a specific dimension or measured position is as critical to quality construction as the tool used to make the measurement. Most modelers use a pencil as the normal choice of Marker. That may work for most cases but will fall short for marking fine dimensions associated with the layout and for cutting scale structures, cars, and other smaller modeling uses. A standard No 2 pencil line, when associated with a particular scale, can have a substantial width. The question then becomes, how to make a mark with minimum width.
- Pencil. If a pencil is what you have, make sure that the point is kept sharp and the pencil is held perpendicular to the material being marked. If you have a choice of pencils, a harder lead pencil (2H, 3H, or 4H) is a better choice. You might also select a 0.3 mm mechanical lead pencil (normally used for drafting) to provide a thinner width line.
- Marking knife. Carpenters and metal workers frequently use a "marking knife" to mark measurements on the materials they are working with. The marking knife makes a much thinner impression on the material.
A specially designed marking knife is relatively expensive for a first toolbox and a hobby knife can be a good substitute. Source - Marking Knife, woodworking specialty store or online.
How do I cut it?
The correct tool for cutting depends as much on the materials as the nature of the cut to be made. The tools for cutting standard lumber for the construction of a module or layout structure are much different than those used for working with scale lumber, styrene, or kit materials. This guide addresses the scale modeling tools.
- Hobby knife. There are knives designed especially for hobby purposes. The blades are smaller, come in different shapes, and are very sharp. At least two knife handles, sized to fit small and larger blades are appropriate. A #1 Handle (Smaller) and a #2 handle (Medium) will work well. As an alternative to the #2, a #5 handle (Large) is a good choice. As for blades, a stock of #11, #2, #17, and #18 will cover most needs. The smaller handle with a #11 blade is used for cutting and is well suited for the draw or pull action.
- The #2 or #5 handles are best for chisel type blades and the pushing action for using those blades. When you go to the hobby store or search online for blades you will find a wide selection available. While it is beneficial to know about all the blades that exist, it is seldom worth the cost of gathering an inventory of the full selection. The one rule concerning blades is to use a sharp blade which means changing blades often. Source - hobby shop.
Helpful hint: Keep an empty soda can on the workbench as a "Sharps" container. Put the used blades in the container. You may also be able to find a purpose-built "sharps" container at your local drug store for a relatively low cost.
Helpful hint: You might be tempted to use a standard box cutter or shop knife for your hobby work. It will not serve well for modeling. The blade is too thick and the ability to make small cuts is very limited.
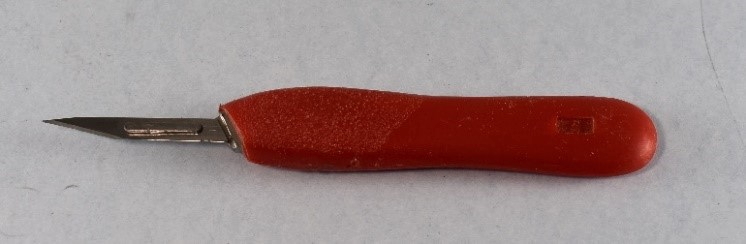
- Scalpel. If sharpness and fine cutting count in modeling (and they do), you may find the scalpel a good alternative to the standard hobby knife. The scalpel blade is much sharper than the hobby blade and the blade is also thinner.
Consider that the doctor asks for a scalpel and not a Xacto #11 when cutting on people and there must be a good reason for this. If you do select a scalpel, in addition to your #11 hobby knife, do not forget a stock of scalpel blades. Source - hobby outlet online.
Note: For modelers new to using hobby knives a word of caution is warranted. The knife blades and especially scalpel blades are extremely sharp and can cause serious injury if not used properly and carefully. When cutting any material, it is best to use multiple cuts applying only a small force. Be patient, don’t try cutting through material with one or two deep cuts - this will almost always end in poor results and possibly injuries. Multiple light cuts will produce better results and is a much safer technique.
- Straight edge. To make clean straight cuts you will need a cutting guide or straight edge. The temptation is to use your scale ruler but that will certainly result in damage to the ruler. A better choice is a purpose-built metal straight edge which can be found at an art supply store or hobby tool supplier.
The 12-inch tool is the better choice for general hobby use. The square, discussed in the measurement section, may also serve as a straight edge for cutting. Source - artist supply shop or hobby outlet online.
- Cutting mat. Your model railroading career can end very quickly if you leave the kitchen table or desktop with several cut marks from your work, so using some form of cutting mat is essential.
A "self-healing" cutting mat is the preferred work surface. A 12 x 18-inch mat is a good choice for the beginner because it will support most projects. Source - hobby store or craft store.
- Scissors. There will be many instances when a pair of scissors will be necessary to complete a project. A sturdy candidate would be a pair of Fiskars Amplify Mixed Media Shears. They do it all. Source - craft store.
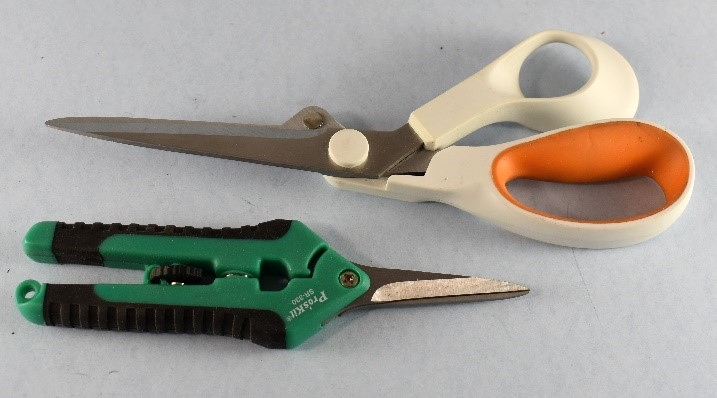 Scissors – FISKAR Amplify Shears on top
- Saw Blades. You may find a need for a hobby sized saw. If so, look to a razor saw that will fit in your #5 knife handle. Select a blade with a thin kerf (thickness) and a high tooth per inch count. Unless there is a need for deep cuts, select a blade with less cutting depth. Razor saw blades, even with a backing sleeve can bend easily and once bent, are useless as a saw. Try to make your cuts as "pull" cuts rather than "push" cuts. Source - same place as knife handles and blades.
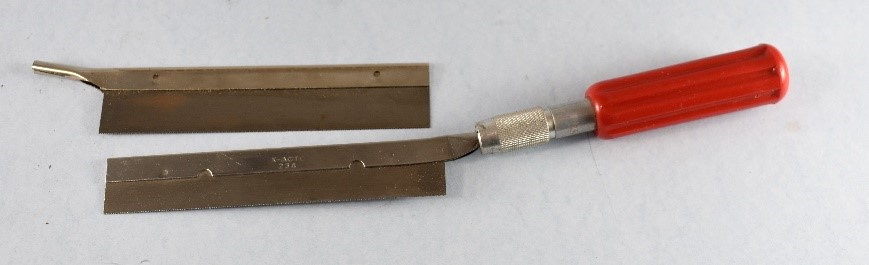 Saw Blades (Notice Hobby Tool Handle)
How do I get the proper fit?
Most craftspeople, or "Makers", learn through experience that getting a final fit on a first cut is seldom achieved. The reality is, after making the cut, some trimming is always necessary to get two or more pieces to fit together in the manner intended. This results in the two basic rules on cutting; (a) Measure twice, cut once, and (b) Leave a small amount of excess material for trim or sand to fit. Because of the very small dimensions we are dealing with in modeling, these are two great guidelines to follow.
- Sandpaper: Most of the materials we work with are amenable to reduction by sanding. The trick is to use the correct grit and to keep the surface being sanded properly aligned. Sandpaper comes in various grits and media. The coarsest grits are normally far too severe for our uses. It is most often better to use a higher number grit (less abrasive) and sand for a longer time. For example, 180 grit or higher will most often serve well. Purchasing a pack of paper with several grits will let you experiment on using paper to gain the final fit. Make sure that the paper is placed on a hard, flat surface and the material being worked is moved across the paper. (The material moves across the sanding media - the media does not move across the material.) Most modelers also find a wood or metal block with square sides (a piece of aluminum angle might also serve well) to serve as a sanding guide. If the piece being sanded is moved tightly along the guide block it will remain perpendicular to the sanding surface. Maintaining a flat sanding surface and a perpendicular orientation to that surface goes a long way toward getting the final fit desire. The best choice for all-around use is Wet and Dry paper type. Source - hardware store.
- Sanding sticks. A developed skill of model railroading is finding alternate uses for common materials. Such is the case for the foam centered Emory board, designed and sold for fingernail care. As with sandpaper, the boards come in various grits. The boards can be placed on a flat surface and the material to be sanded moved across the surface of the board. Because of the foam center, the boards can also be trimmed to size and be used as a sanding stick. In this manner, they serve extremely well for interior sanding of window and door holes. Foam centered Emory boards make good sanding sticks. Source - beauty supply store, cosmetic section of drug store.
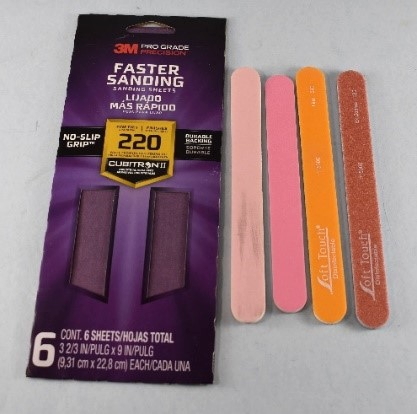 Sandpaper and Sanding Sticks
- Files. Some common materials (wood, metal and styrene) can also be finished with a file. The skill necessary to "file to finish" takes time to develop. The most common files used by modelers are jeweler's files and miniature diamond files. The standard jeweler's files work well on either wood or styrene and the diamond files work well on metals. Files are normally sold in sets and, much like knife sets, they include tools not frequently used. A flat file, triangular file, and round file cover most requirements. One specific use for files that rivals the use of sandpaper is getting the final fit on internal openings such as for doors and windows in a model. Source - hobby store, hobby outlet online.
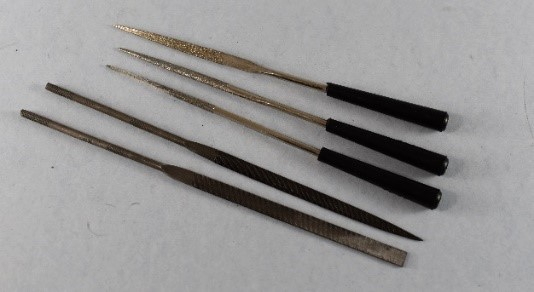 Files - Diamond Files on Top
Let's lay some track
Elsewhere in this guide, you will be provided some detailed instructions on how to create a "bulletproof" track system. (See
Part 4 of the Guide.) To enable you to do that a few tools will be required.
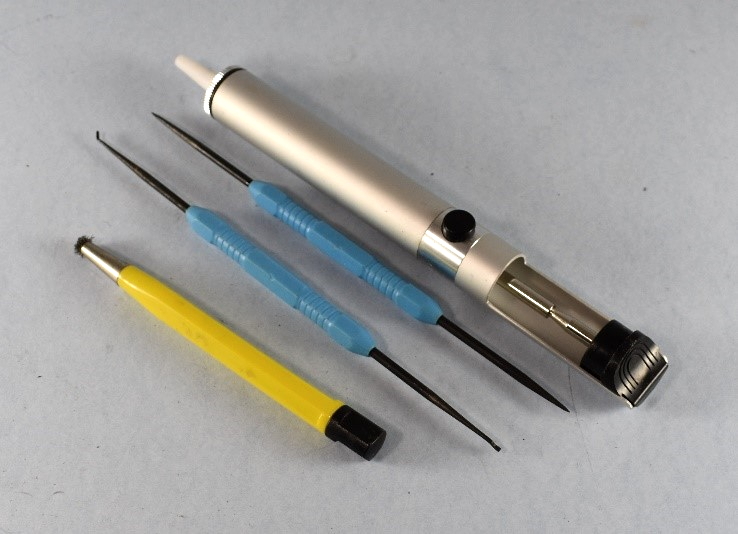
- Radius tool or trammel points. Much will be said about curved track and how to maintain a smooth flow through a corner on the layout. Drawing accurate curve radii markings to aid in accurate track placement is key. There are many tools such as trammel points that, when used with a bar or ruler, let you draw an accurate curve. An alternate method is using a homemade radius bar. Start with a piece of wood about 1 inch wide and 3/8 inch thick. Inscribe markings one inch apart along the length of the stick. (A wood yardstick is great for this purpose). Start the markings (point zero) one inch from one end of the stick. At point zero and at the several inch markings suitable for curve radius for your scale, drill a 3/16 inch hole. Now, using a pushpin or something similar, tack the point zero hole at the center of your curve radius and putting a pencil in the correct radius hole, scribe the necessary curve. Source - hobby supply outlet, woodworking specialty store.
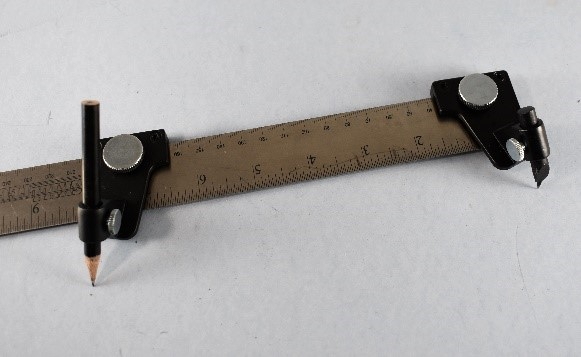 Trammel Points with ruler
- Pushpins. If you intend to use cork or similar materials as roadbed, a way to hold it in place while glue sets is required. A proven method is by use of push pins. When you purchase pins, look for ones with long shanks because you will use them for many other purposes. You will probably use a lot of push pins. Source - craft store.
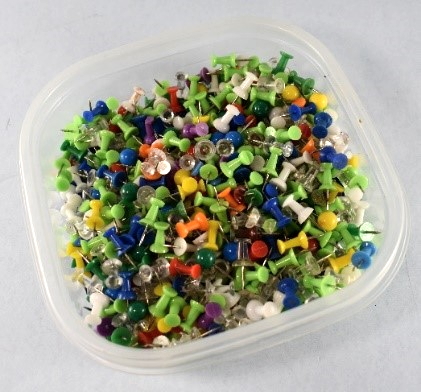 Push Pins
- Nail setting pliers. To hold the track in place while allowing adhesive to set or while applying ballast to the track, small steel nails are normally used. If you are using "flex" track or sectional track, those track pieces come with small holes drilled through the ties to accommodate the nails. The key is to set the nails deep enough to hold the track in place without damaging the plastic ties or deforming the track. The common tool used to set nails is a set of needle-nose pliers or design-specific "nail setting" pliers.
A good choice are parallel jaw pliers that allow one to hold the nail firmly and press straight down to set the nail. Regardless of the tool you choose, practice with some scrap track to get the "feel" for how much pressure is required and how to tell when the nail is set. Source - hobby supply outlet. Source – hobby supply outlet.
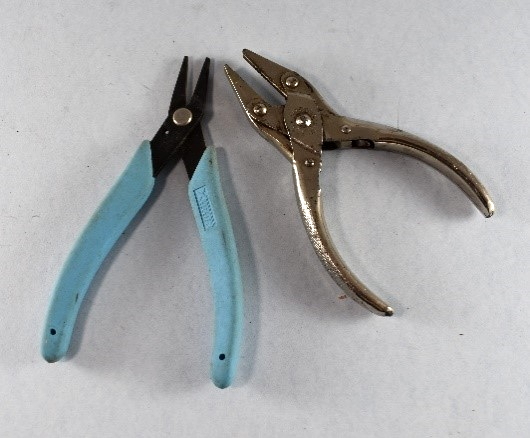 Pliers for Setting Track Nails – Needle Nose and Parallel Jaw
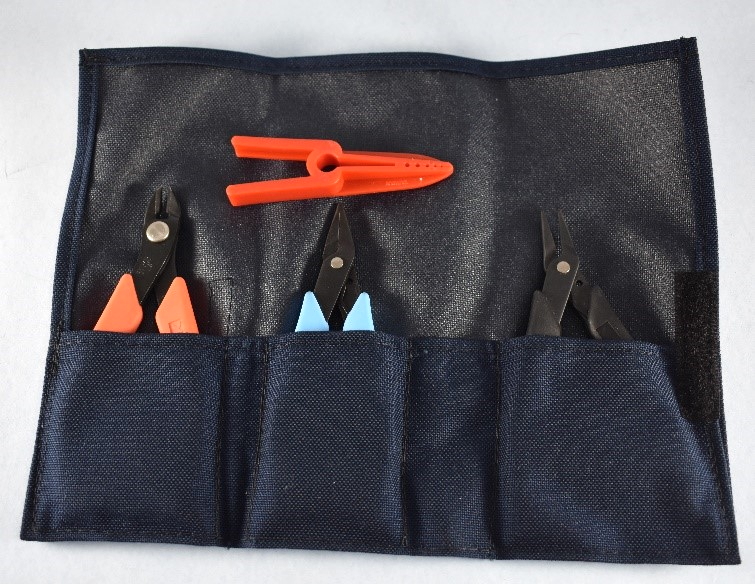
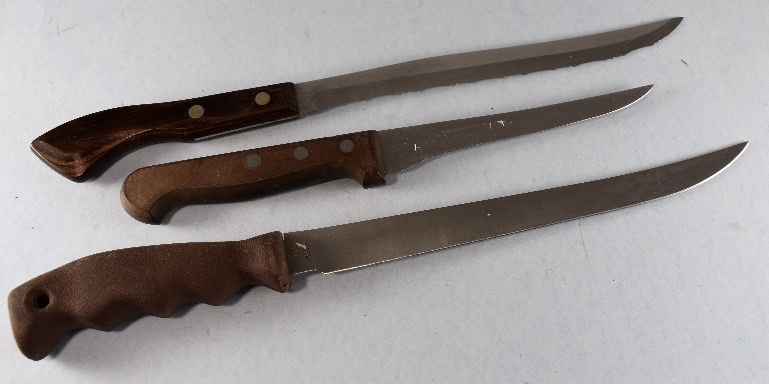
- Rail Nippers. Unless your track plan is designed specifically to use only 'sectional' track, cutting track to size will be required. Two tools of choice are the Razor saw (see above) or the purpose-designed rail nipper. While looking like a side cutter or dyke pliers, rail cutters or "nippers" are a specially designed tool. The blades of the cutter are flat on one side so the finished cut is also flat. This is important to achieve close-fitting joints between track sections. RAIL CUTTERS ARE NOT WIRE CUTTERS AND SHOULD BE PRESERVED FOR THEIR DESIGNED PURPOSE. Get the correct model of cutters for your track scale and follow the instructions for alignment of the tool for cutting rail. WEAR SAFETY GLASSES WHEN CUTTING RAIL WITH NIPPERS. Source - hobby shop.
 Rail Nippers
 Track Laying Tool Set
- Tools for Joining Rails. Mechanically connecting the ends of rails is done using "rail joiners" which slide from one rail to the other. However, the task requires the modeler to exert a "push" force on one end of the joiner while maintaining alignment of both of the rail ends to enable the joiner to slip onto the second rail. Any number of specific design tools have been created to enable this seemingly simple task, but few meet the challenge. Most modelers use smaller needle-nose pliers, a small standard tip screwdriver, or a cuticle stick. Try them all to find the tool and method that works best for you. Source - hobby shop, hardware store.
 Rail Joiner Tools
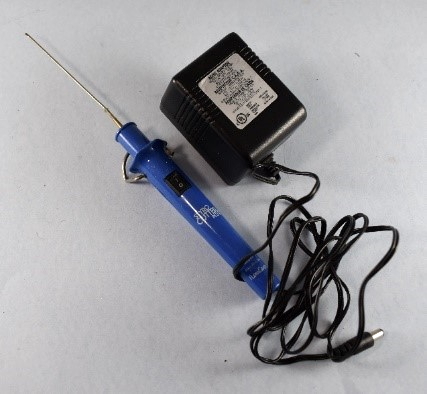
- Soldering iron. A common practice in track laying is to solder the individual rail sections to each other at the joiners. How best to control the alignment of the track will be addressed in the tracklaying section of this guide. To complete soldering you will need a suitable soldering iron. An iron of 35 to 45 watts will meet the needs for HO and smaller scales. A larger iron may be required for larger scales. If you can find an iron that has replaceable tips, that may be the better initial purchase option. Also consider a solder iron with a digital temperature readout, as well as one that will turn itself off after some time not in use. Source - hardware store, hobby shop, online.
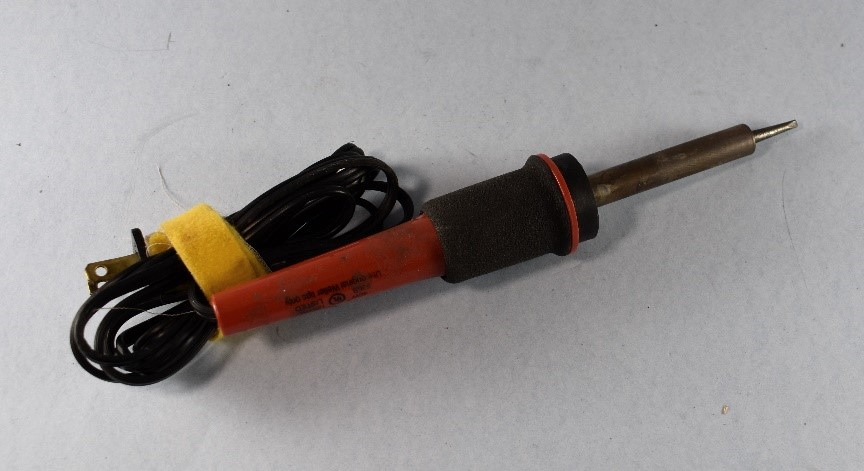 Soldering Iron
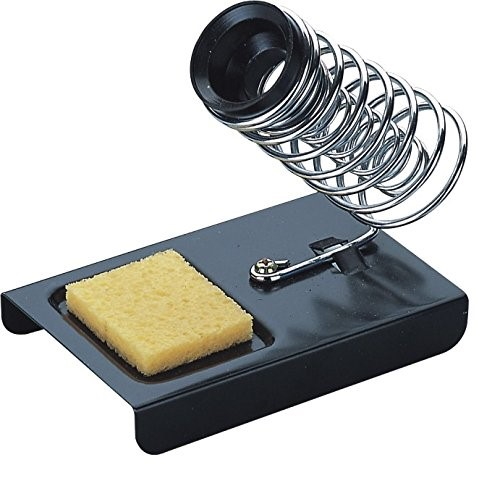 Soldering Iron Stand
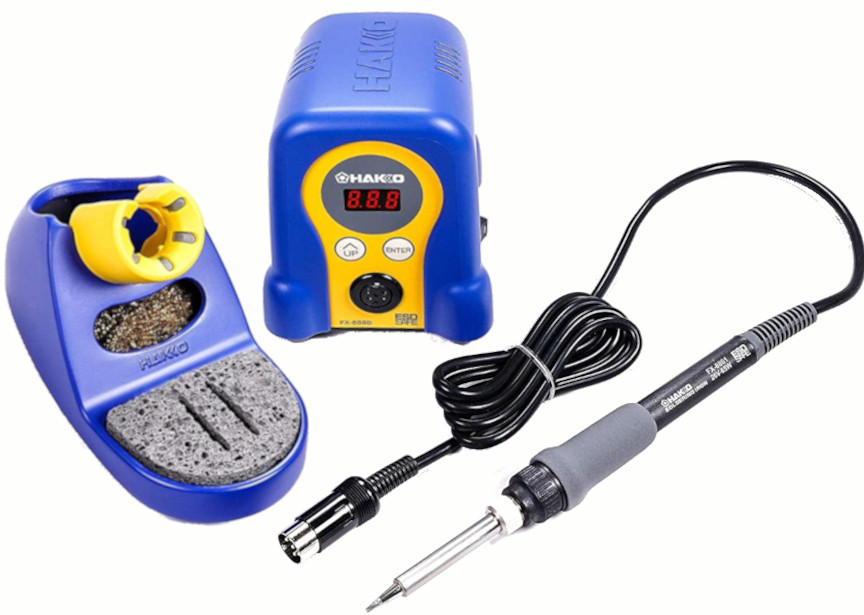 Soldering Iron with replaceable Tips, Stand and Digital Readout
- Soldering tools. A stand or holder for a hot soldering iron is essential. Laying a hot iron on the work surface is a sure invitation for damage or personal injury. Solder is required and the common choice is a 60/40 tin/lead mixture. Lead-free solder is available and, if you intend to work with electronics, lead-free will be the better choice. Because cleanliness is essential to a good solder joint, a mechanical cleaner (scratch brush) and a chemical cleaner (flux) are recommended tools. Many modelers find a tool to hold things in place while soldering to be useful and there are sets of simple soldering aids available. After the solder has cooled, it is good practice to clean the residue flux from the joint area and cotton swabs and isopropyl alcohol are the standards for the task. Source - hobby shop, electronics supply house.
 Soldering Tools - Scratch Brush, Wire Holders, De-solder Tool
- Rail cleaner. A common problem with operating layouts is that the rails tend to accumulate dirt and "crud" over time and require cleaning. Several different tools and methods for cleaning rails and keeping them clean are available. However, doing the initial clean (or cleaning after a longer period of non-use) calls for a different tool. The cleaner of choice will remove the accumulation of "gunk" without excessive abrasion or pitting to the track or disrupting track alignment. A good tool for this task is the track eraser, a silicone block with a very fine abrasive mixed in. There are other purpose-built track cleaning tools. A common cork will also clean track. Source - hobby outlet online.
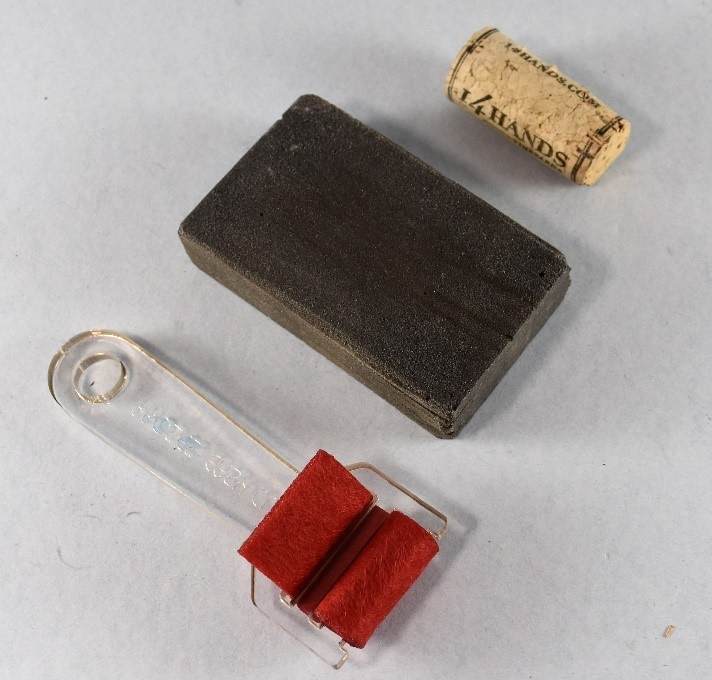 Rail Cleaning Tools
Getting Power to the Rails
In both DC (Direct Current), an analog power system, and DCC (Digital Command and Control), a digital power system, passing electrical power from the source to the track requires some electrical wiring. The tools required for this task, in addition to some already addressed, are reasonably standard. Wire sizes used in wiring a layout can vary in size (gauge) and hence the capacity of the tools selected may vary. For example, wire cutters required for a 12-gauge power bus will need to be more stout than cutters needed to handle 26 gauge feeder wires. The choice of specific tools may be driven by your modeling scale.
- Wire cutters. DO NOT USE SPECIALLY DESIGNED RAIL CUTTERS (covered previously) TO CUT WIRE. The most common tool for cutting wire is the diagonal cutters or "dykes". They are available in various sizes and selecting a pair that will handle the largest gauge wire to be used is a good choice. Source - hardware store.
- Wire strippers. The wire that is used in modeling, either solid or stranded, will be enclosed in a sleeve of insulating material. The tool designed to cut away the insulation is the wire stripper. The proper selection is one that will handle all gauges of wire to be used.
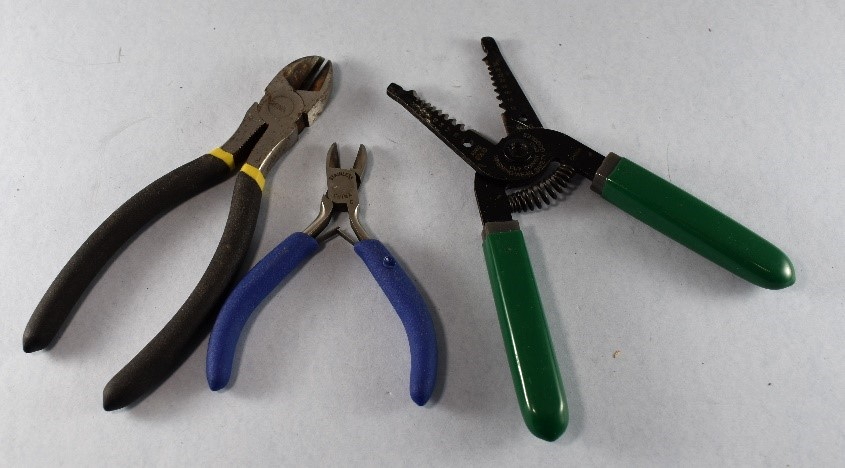 Wire cutters (two images on left) and wire stripper (image on right)
- Because strippers for smaller wire do not normally allow the cutting of larger gauge wire, two tools may be required. Wiring a layout requires many electrical connections and the stripper will be a much-used tool. Select wisely and learn how to use it with scrap wire. Source - hardware store, electronics supply outlet.
Drill and Bits. The electrical connections to the rails will be on the top of the layout while the actual wiring runs will be under the table or the underside of the modules. This arrangement requires that the track feeder wires be passed through the layout tabletop materials. The tool required is a hand drill or smaller battery-powered electric drill and bits slightly larger than feeder wire diameter.
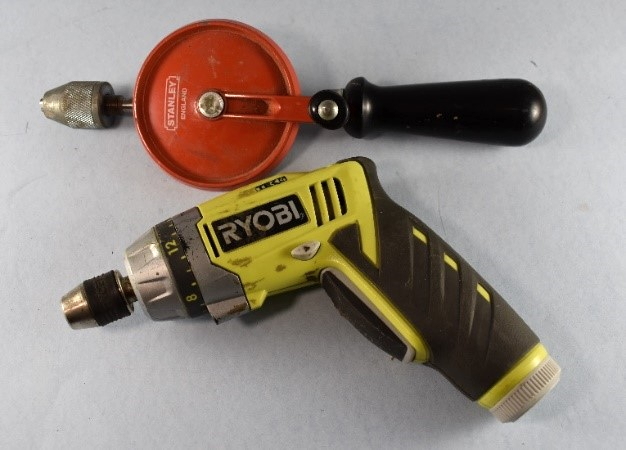 Hand Drill and Small Battery Powered Drill
If the layout base is thick insulating foam board (Blue board or Pink board), a piece of wire of the proper diameter to pierce the full thickness of the foam must be used. Source - hardware store.
HINT: consider a battery-powered electric drill that will also be useful for household jobs.
- Electrical joint insulation. The wiring running under the layout will include many locations where feeder wires are joined and normally soldered to the main power buss wires. Those joints must be insulated to prevent short circuits. The two most common means of insulating are liquid tape or heat shrink material. Liquid tape is applied over the entire electrical connection area and allowed to dry. It is important to make sure that the joint is sound before applying the liquid tape because it does not remove easily. Heat shrink, either tape or tube, is placed over the joint and then heated to "shrink" the material around the joint. DO NOT USE A SOLDERING IRON TO HEAT THE HEAT SHRINK MATERIAL; IT WILL PROBABLY DAMAGE THE SOLDERED JOINT. DO NOT USE A STANDARD "HEAT GUN" AS IT WILL DAMAGE YOUR WIRING AND OTHER WORK MATERIALS. A good heat source for reducing heat shrink material is a miniature heat gun designed for use in rubber stamp making and other crafts. An alternate is a common hairdryer. Source - craft store, hobby outlet store.
What tools and materials do I need to construct scenery?
Creating the visual empire on the top of your layout, called scenery, will require a variety of tools, depending on what materials you use. While the market place is full of appealing implements, the cost of the items, and the ability to use less expensive alternates should be considered.
- Cutting Foam. The introduction of insulating foam board, in varying thicknesses for scenery use, has resulted in several tools to cut foam. Most of the tools involve a thin heated wire that melts the foam to complete "cutting". These tools work well, and each design has pros and cons. If you do choose to purchase a foam cutting tool, one that is a single cutting wire (similar to a wand) may be the most useful design. Again, learn how to use the tool by practice on spare foam. Practice making the kinds of cuts you will use in creating your scenery. An alternative to the hot wire tools is the fillet knife.
 Fillet Knives are Useful Tools for Cutting Foam
 The thin blade of the knife permits good control of the cuts.
A thin blade serrated edge knife is also a good choice. Keep the edge sharp. Source, Hot Wire Cutter - hobby shop. Source, Fillet Knife - thrift shop.
- Shaping Foam. Once cut to a basic shape, the foam is normally worked on to give it a more realistic appearance or shape. The tools preferred for that effort are the Sureform tool (a very rough-cut file like tool), and a selection of picks or scribes. The Sureform comes in several sizes and the one that has a small head and a comfortable handle is the most common choice. The picks used are normally either discarded dental picks or common automotive repair picks. Source - hardware store.
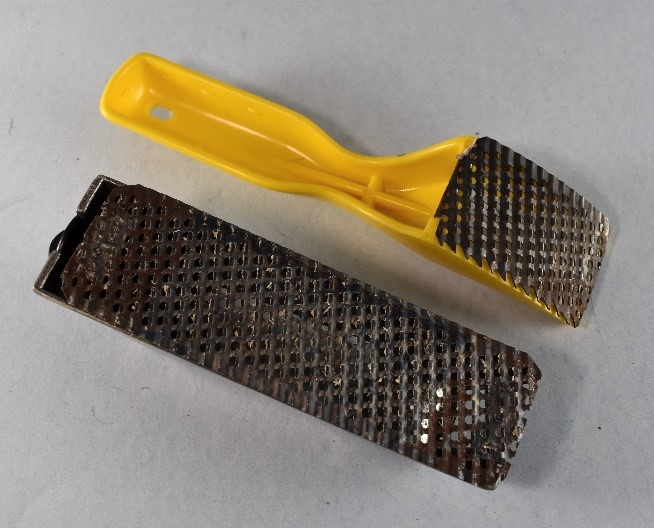 Sureform tools
- Using Hydrocal. Still in common use, Hydrocal (a modeling plaster) demands some different tools to be used properly. The first set of tools are those needed to repeatedly mix batches of the plaster. Because Hydrocal, when set, is very strong and hard and is not easily removed from utensils, picking the correct tools is important. The mixing bowl of choice is rubber so the bowl can be flexed to remove the dried residue from each mix.
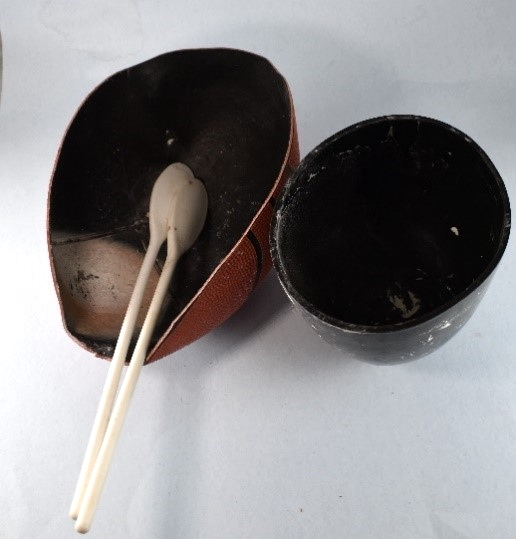 Rubber mixing bowls
There are several rubber bowls offered but a suitable substitute is half of a discarded basketball. To complete mixing, a selection of inexpensive plastic mixing spoons is the best choice. Source - hobby shop, thrift shop.
- Plaster Application tools. Getting the mixed plaster from the bowl to the layout and placed, as desired, requires both hands and, usually, some type of brush. HYDROCAL IS HYDROSCOPIC AND WIILL EXTRACT MOISTURE FROM YOUR HANDS IF NOT PROTECTED. The use of protective gloves is appropriate. While latex or nitrile gloves will work, the common rubber gloves for kitchen use may be a better choice. They are more durable and can be reused numerous times. The rough texture of the gloves makes it easier to grip wet items and even aids in spreading the plaster by hand without leaving a smooth hard surface which does not look natural. Spreading wet plaster on the surface can also be achieved with a paintbrush. The most inexpensive bristle brushes serve well. Plaster sets quickly and if not washed off immediately, will permanently damage the brush. Source - hardware store.
- Other scenery tools. After the basic scenery base is established, the finishing process is normally a series of steps involving paint, stains, and materials such as ground foam. Painting normally requires brushes for application and the specific media used and the manner of application determines brush type. A common factor is keeping the cost down. Less expensive throwaway brushes are preferred. Stains and adhesives require some kind of spray bottle. Having several bottles at hand, each for a different liquid is a good practice. Clean the spray mechanisms frequently. A bottle that sprays a mist is very handy for applying the topcoat to the finished scenery. Ground foam or similar scenery materials are normally spread over an area of the layout using some sort of shaker container or a small kitchen strainer. Shaker bottles are available or can be made to fit the need. One tool, while not common to most layout construction efforts but which is very useful, is a common hatchet style Ionic hairdryer. The key to dryer selection is to get one that applies heated air to the scenery surface at low flow rate so the scenery material is not blown away. Source, Spray Bottle - left over household use, beauty supply store. Source, Hair Dryer - thrift shop.
Building Structures and Cars
One of the challenges and enjoyments of our hobby is to create an environment in which our railroad serves a purpose. That will normally include the presence of structures and rolling stock to provide destinations and the means by which goods can be transported via our railroad. Options for obtaining these include buying things already made, constructing structures from kits, or creating items from raw materials (scratch building). The art of construction (kit or scratch building) requires some additional tools not previously discussed.
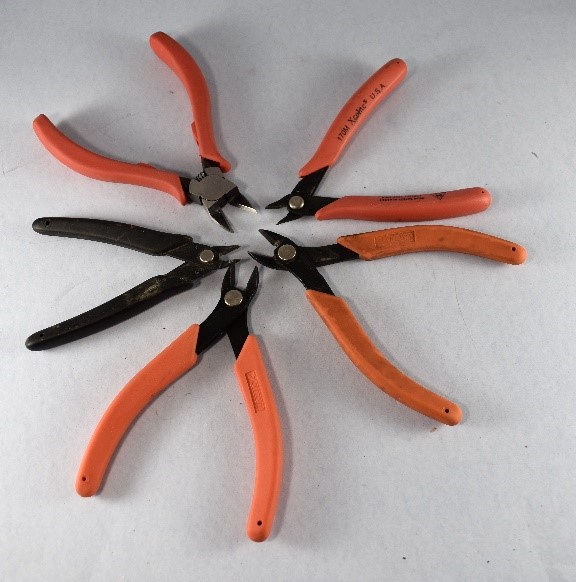
- Sprue cutter. Plastic kits come with the various pieces and parts attached to a "sprue", a waste part of the casting process, which links the pieces together in the mold and provides the flow path for the hot plastic to the individual parts in the mold. Removing the individual pieces from the sprue without damage or need for major additional finish work is the job of the sprue cutter. These tools are normally available in either plier or tweezer form. DO NOT USE A SPRUE CUTTER FOR ANY OTHER PURPOSE. Source - hobby shop.
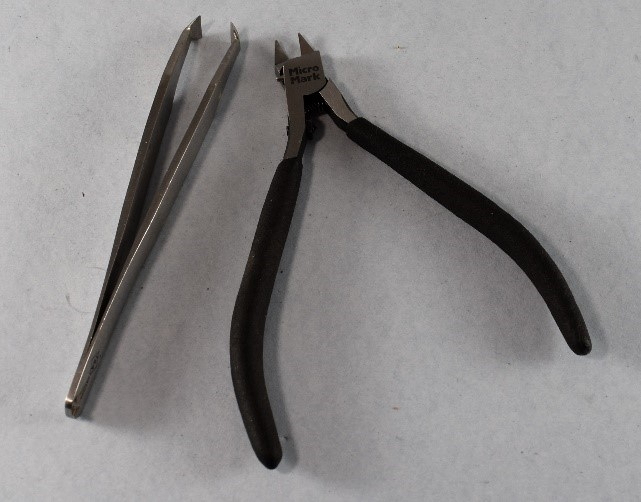 Sprue Cutters
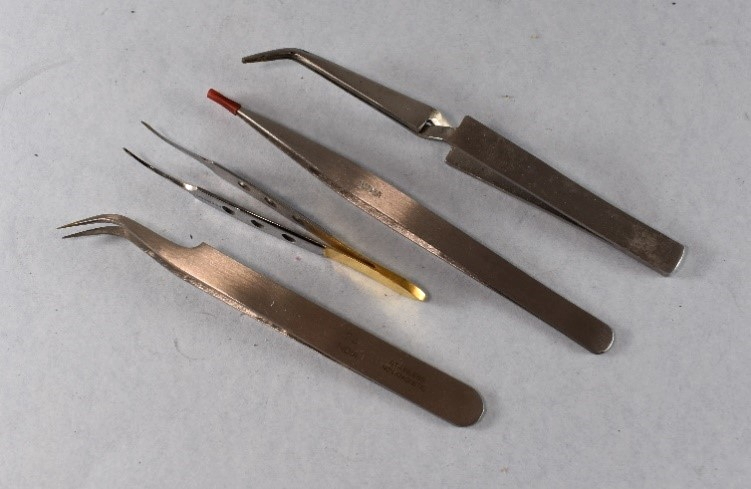
- Tweezers. The one tool that you can apparently never have too many of is tweezers.
They are available in all manner of designs and sizes. Several tweezers will be useful, and their selection should be based on their ease of use and fine point design. Since the object of tweezers is to pick up, position, and hold items, these should be the guiding criteria for selection. Source - hobby supply outlet online, craft store, beauty supply outlet.
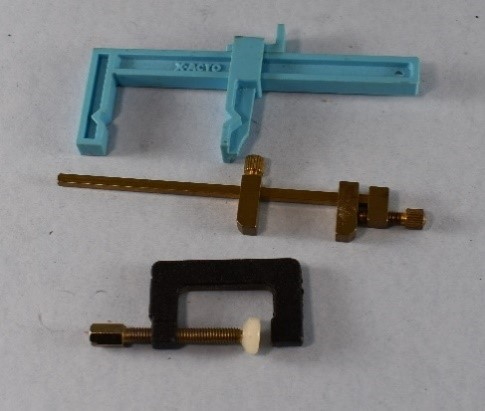
- Clamps. For items being joined so that they remain in the correct place while the adhesive sets, some type of clamp is normally required. Selection of clamps with a universal application is a good idea.
Plastic clamps are not normally used with plastic models since the solvents used to “weld” plastic together may also weld the clamps to the model. For the same reason, wood clamps are not used with wood models. A good selection of clamps will include some bar clamps of the correct size, some spring clamps, and some C-clamps. Some modelers have enjoyed success using hair clips and rubber bands as clamping devices for smaller items. Source - hobby shop, hobby supply outlet online.
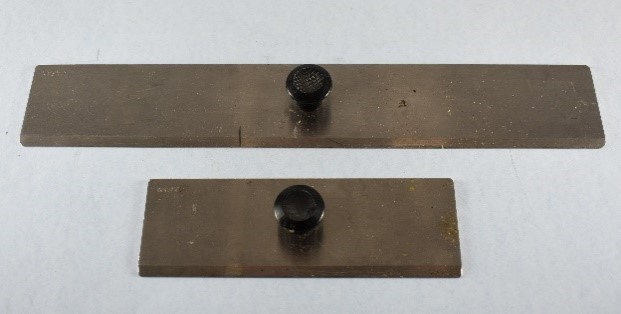
- Angle blocks. For construction, the ability to achieve square corners and plumb (perpendicular) sides is critical to producing a quality product. There are many tools available but one that serves very well is the angle block. Two basic designs are available. The simplest is one that looks like a piece of angle iron with the adjacent sides finely milled to a right angle. The second is the 1-2-3 block with all six sides milled to precision and all sides at 90 degrees to the adjacent sides.
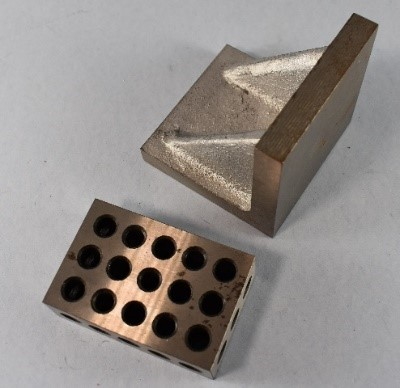 Angle block and a 1-2-3 block
Both designs allow the model sides to be clamped in place at a 90-degree angle to each other and plumb while the adhesive sets. They need to be cared for to protect the surfaces and cleaned periodically to remove any accumulated adhesive or other foreign material. Source - hobby supply outlet online, machinists supply house.
HINT: For modeling with wood, LEGO blocks can be assembled to create a very stable and accurate square corner guide. Source - LEGO store, toy store.
- Paintbrushes. Unlike the brushes recommended for scenery work, a set of fine, higher-quality artist brushes will be required for painting and weathering models. Start simple and go with better quality rather than the lowest price.
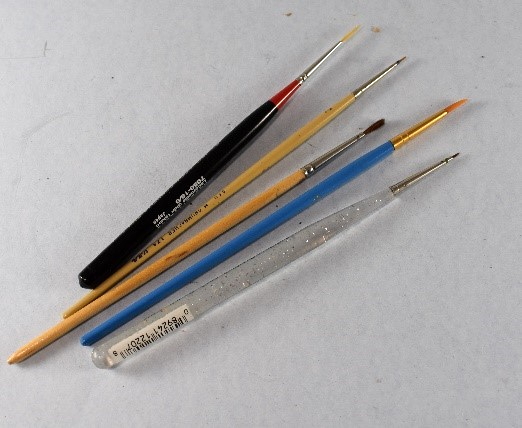 Assorted paint brushes
It is a good idea to have a couple of the more common brush sizes and shapes (detail, general painting, highlighting, etc.). Get brushes with bristles appropriate for the paint you use. A good brush cleaning tank and drying stand are useful. Use the correct cleaner for the paint in use and have additional cleaning tanks, as necessary. Source - craft store.
But How Do I Actually See My Work?
Being able to see your work is of paramount importance in our hobby, especially when adding fine details and painting small parts.
- Light. The first means of improving vision is to provide more and better light on the subject that we are working on. There are many different lamp designs for static and portable lights for use on the workbench or the layout and no specific guidance is required. However, there are two recommendations to consider in selecting lights. First, pick a light that will be easy to use and to focus on the area of interest. A portable high lumen lamp works well for the layout or work bench. A good high energy headlamp is also very useful for working under the bench or work that requires two hands. Being able to point the light right where you are looking minimizes frustration. Second, if the light is required for painting models, use the same type of light that will be used to display the model when finished. The color shift that occurs with different types of light (light frequency/wavelength) will change the appearance of a model when you move it from the workbench to the layout.
- Vision Assistance. Enhancing vision, even for those with very good eyesight, is common for close-up and detailed work.. A common method is to use an optical enhancement visor or Optivisor headband magnifier. This tool comes with several different lenses and may include attached light sources. Another way to enhance vision is to use increased diopter glasses, normally sold as "reading" glasses. Select the enhancement factor desired and use the glasses, as appropriate. A more recent addition to the field is the optical device employed by dental hygienists or similar professionals. The head lamp is a central LED light and adjustable loupes mounted to an eyeglass frame. They provide the vision enhancement you want and light where you need it but these tend to be quite expensive. Source - hobby supply outlet online, drug store.
Making sure that it will work
One of the most frequently used but overlooked tools is the NMRA Standards Gauge. This is a simple pressed steel device that allows the modeler to check if track is in gauge, wheels are in gauge, that there is proper clearance around the track, and that coupler heights are correct. The gauge also allows a check of the various dimensions associated with the correct functioning of turnouts and crossing. To detect problems with trucks on cars the gauge supports measuring wheel flange dimensions and wheel tire widths. If there are mechanical problems on a layout or operating equipment, the NMRA Standards Gauge is one of the most important tools needed to find the answer. An NMRA Gauge of the proper scale is essential. One with the enhanced clearance sleeve is even better.
Source -
NMRA Store online.
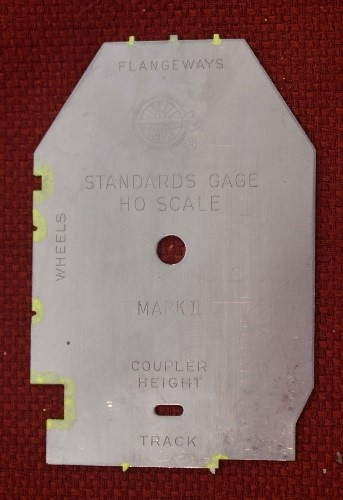 NMRA Standards Gauge
Your own toolbox
This completes the discussion of the tools most essential to entry into the hobby. As you read through the Guide and carry out the various processes described, you will encounter recommendations about additional tools that you might need. Over time, and with experience you will add to your toolbox. You will also find alternate safe uses for some tools and find others that have little or no utility for you. Rarely will you find a tool that has no practical use. Your continued development of skill in the use of your tools will result in an increased quality in all your modeling activities.
FIND THE RIGHT TOOL FOR THE JOB AND HAVE FUN!!!