Note: This is not a 'How To', but a display of a completed 'Scratchbuilt Project' showing what can be done with some materials and time. It does not have to have been judged for AP Points.
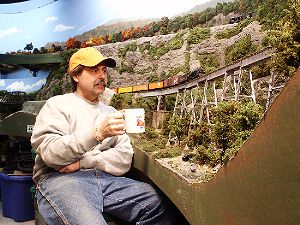
"Big Bridge" Over Gawahpawn Drop
by Matt Hewitt
January 2, 2006
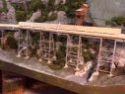
I'm modeling the Appalachians, so I needed bridges. Not being able to have a lot of bridges, how about one really big one, and a few small ones. If it's going to be big, it has to be a tall steel viaduct, and to make it different, let's add a curve. The plans were drawn, area located and construction started. When the smoke (and plaster dust) cleared, it was over 5 feet long and from start to finish it consumed around 200 hours. Big steel viaducts will add a ton of interest to your railroad, but be ready to spend the time.
Getting ready for the bridge
Success of this project (like most) starts with planning. Many things have to be taken into account: how long, how tall, straight, curved, both, flat, incline, approaches and on and on. As you can see, short cuts won't work on this project. Sorry. One big secret is to get the bridge and both approaches flat to each other. You don't want a big dip or hump where the bridge and ground meet.
Having a large area ready for a bridge
With no benchwork under, just a big gap to cross, I attacked it as though there's no bridge going in at all. By this, I mean running the sub-roadbed all the way across. Once this is done, you can measure out for the bridge and mark it off. Also, figure the height now. Now you're ready for the next step, supporting benchwork.
When building the benchwork, make sure it can handle all of the weight that will be added so that it won't sag in time. One other thing, bridges, especially big ones, will not withstand a lot of flexing. If this is going on a portable layout, this is not the time to skimp on strength just to make it lighter. Remember, Mikados and Berkshires don't like floors.
I used 2x4s every 12 inches under the bridge with a thin sheet of O.S.B. on top of the 2x4. In order to have enough room under the towers and their footers, allow ample clearance. It's always easier to shim up to the tower footer than to cut the base out more. At each end of the bridge location there is a stone abutment. To support this and the track, I used a 2x4 mounted from the floor of the bridge and abutments. I've said this before, it's easier to shim than cut. The pictures should help.
Now you should have a well-supported solid area for a bridge wide enough and deep enough. Also, your sub-roadbed should just be hanging in mid air across the whole area. Now that everything is solid, cut the sub-roadbed next to the end abutment support blocks (2x4s) and remove. After all that, it's time for a bridge.
Building the Bridge


 You need to keep it straight and flat. For that, I use what I call a Ridge Board. In my case I use 5/8" O.S.B. with a 2x2 pine runner glued to it (study the picture). Make it 10" to 12" longer than your bridge. This will allow you to set it on both sides of the opening with the bridge hanging from it in the middle.
Build all of the plate girders. With your Ridge Board upside down, glue the girders together. They too should be upside down. Keeping them flat and aligned on the board, let them dry before the next step. Once dry, I like to paint the assembly before mounting track. With the assembly painted, turn the assembly right-side-up and mount the track, letting the track hang over 2" to 3" on both ends. Flip the assembly back upside down and you are ready for the towers.
 I used "Micro-Engineering's" steel viaduct kits. Follow the directions. Read and re-read the directions as there are a lot of parts and it is easy to use the wrong part in some areas (pictures should help). Note that I did change the cross X on the towers. This stage of the project will be slow, but stick with it. Pre test the towers on the girders and when good, paint the towers. Mount the towers to the girder assembly. Being upside down, it's easy to get them aligned, and short of final detail, your bridge is done.
 Before it can be installed. You need to use zip ties and lock the bridge to the Ridge Board. Now you are ready to install. Flip it over and lift it to the layout. With the extra wood of the Ridge Board hanging over on both ends, you can simply set it into place. If your track was already in on both sides, good. If not just shim the ends up with track and roadbed and now your bridge rail is the same as the approach track rail. Good job. As you can see, you can lift the bridge assembly in and out as needed during the mounting stage.

 Now, mount the abutments and build up and fix the footers under the towers. Make sure that they touch but do not glue the towers on the footers just yet. Lift the bridge out and do all of the scenery and detail first. Finish everything you can before the final mounting, as it is much easier now than later.

 Reset the bridge for the final time, glue down, cut ties, remove the Ridge Board, connect track, power up and run your first train across.
Go for it! Just remember to plan, plan, plan and take your time. I'm sure the building of a bridge will be one of the more meaningful projects you will do on your railroad.
Have Fun!
Matt Hewitt